Install and Initialize
This page covers the installation and initialization of the ServiceX client, including how to authenticate with an analysis facility and access the ServiceX dashboard.
Page Overview
How to install the ServiceX client
How to access the ServiceX Analysis Facility dashboard
How to authenticate the client with a backend
Setup For ATLAS
Install ServiceX
Important
Using a Python virtual environment is recommended to avoid conflicts with existing packages and to keep the ServiceX setup isolated.
For more information on virtual environments, refer to the Python documentation.
Virtual environments can also be created and managed directly in VSCode. Instructions are available in the VSCode documentation.
The servicex client is installed using pip:
pip install servicex
Initialize ServiceX
With servicex installed, the client must be connected to an Analysis Facility. This step authenticates the environment and sets up the required access. The following command launches the setup wizard:
servicex init
The setup wizard guides through configuring the ServiceX client. After an analysis facility is selected, the wizard provides a link to a sign-in page. On that page, select Sign in with ATLAS to authenticate.
After the ATLAS sign-in is complete, the second link provided by the wizard leads to the token retrieval page. On this page, users should click the button to copy the authentication token:
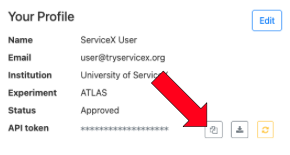
The token should be entered into the command line when prompted. The wizard verifies that the client is successfully configured. Once verification is complete, a prompt appears to choose a downloads directory. Pressing Enter accepts the default location.
If setup completes successfully, a Configuration Complete message is displayed. The next step is to use the ServiceX dashboard.
Setup For CMS
There are currently two analysis facilities that are set up for use with ServiceX for CMS:
To use ServiceX on either of these analysis facilities, log into the Coffea Casa instance and ServiceX is ready to use.
ServiceX Dashboard
This process also authenticates access to the ServiceX dashboard, which provides additional management options beyond token retrieval. From the dashboard, users can view the status of their transformation requests, see why they failed, and cancel any that are currently running.